Create your workspace
For administrators 3 min read
Sign up, sign in with your one-time setup link, and see what's left to set up.
Before you begin
- Your organization's name and your work email address.
A workspace is your organization's private home in ELOS: its own people, data, settings and audit trail, isolated from every other customer. The person who creates it becomes its first administrator.
Sign up
- Open the sign-up page your ELOS contact sent you. (During early access, workspaces are created with our team: choose Request a demo on the ELOS website to start.)
- Enter the Organization name, Your name and Work email, then choose Create your workspace. The work email becomes the workspace's administrator account.
- ELOS confirms Workspace created. Choose Continue to setup to sign in with your one-time setup link.
- The setup link works once and expires after 24 hours. After that, you sign in normally, and once you connect your identity provider, through it.
See what's left to set up
After you sign in, Overview shows your setup progress and the steps that establish your organization in ELOS, with the next one highlighted. Choose Continue setup to work through them on Get started.
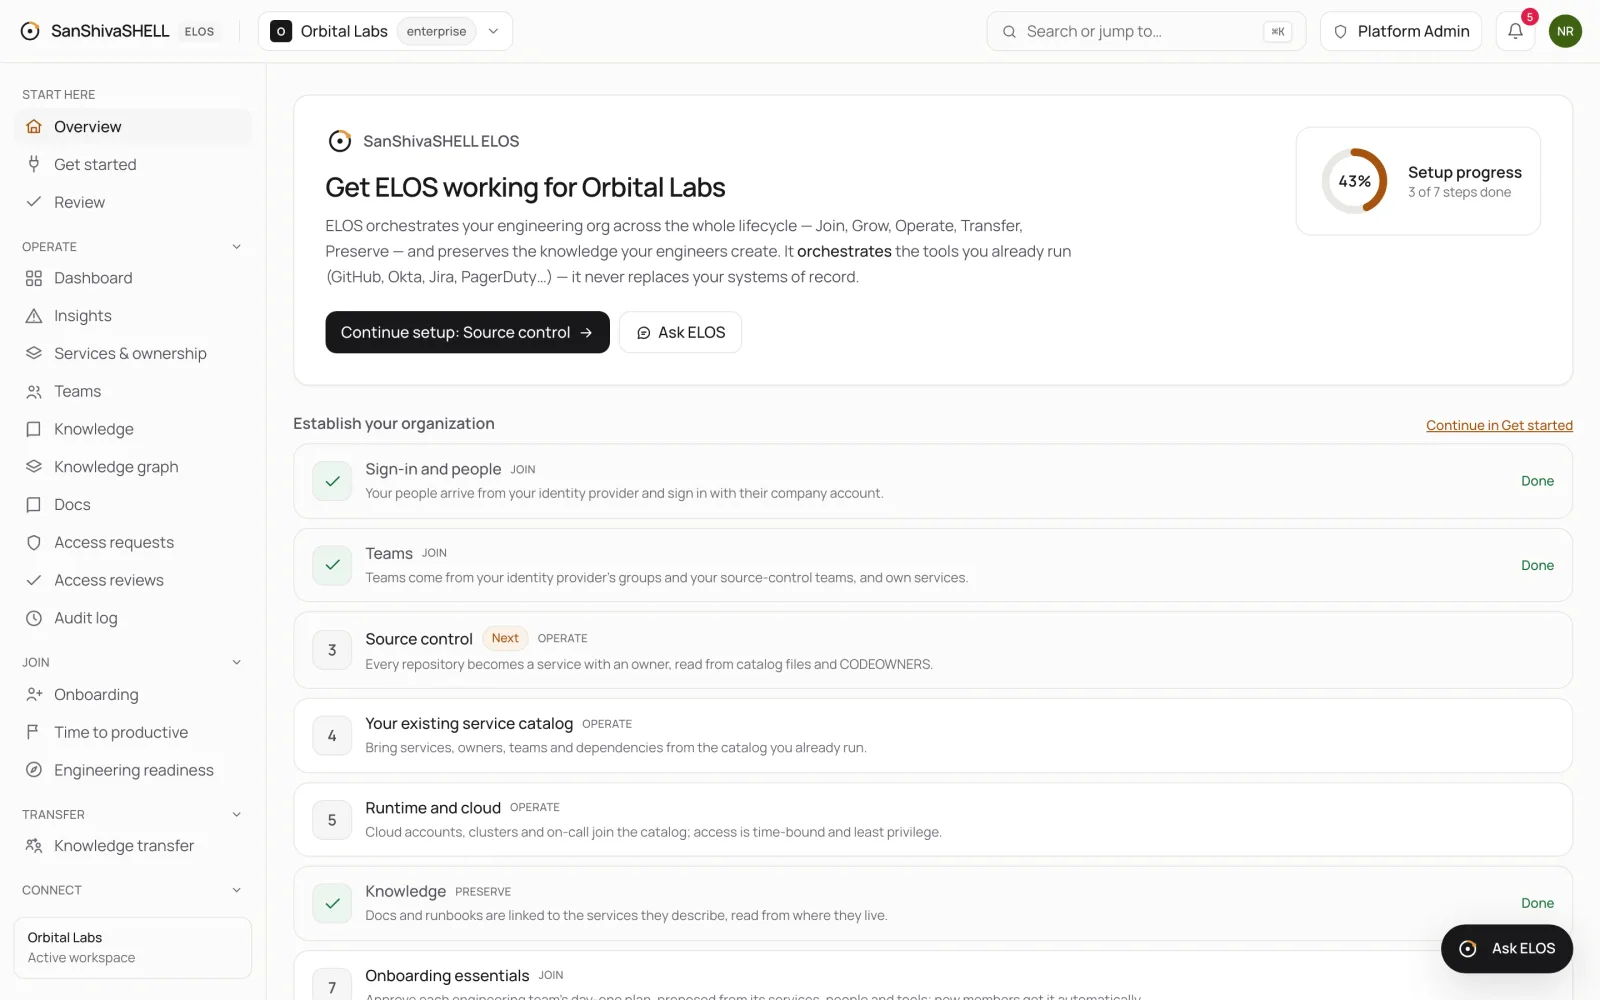
Overview, the setup banner on the Dashboard and Get started all read the same progress, so they always agree.
What's next
- Set up your organization: Establish your organization by connecting the tools you already run, in the order engineering onboarding needs. Discovery runs in the background and progress updates live.
- Connect your tools: Connect identity, source control, cloud and other systems. Each credential is verified with the provider before it's trusted.